
Steel Stud Framing In Mishawaka
|
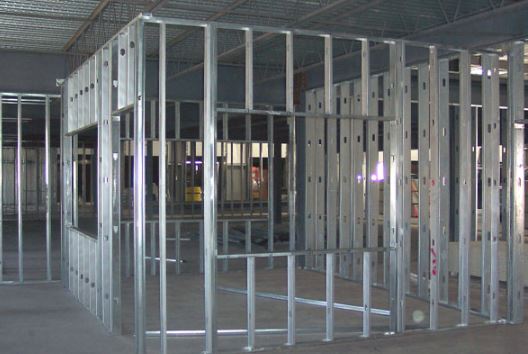
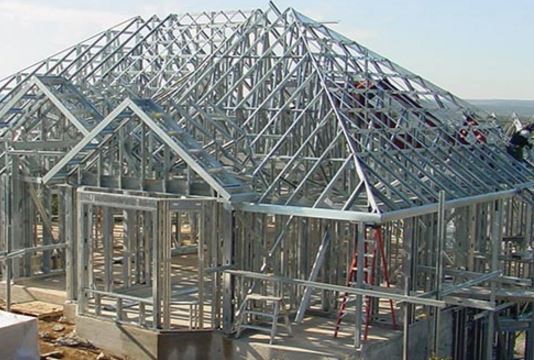
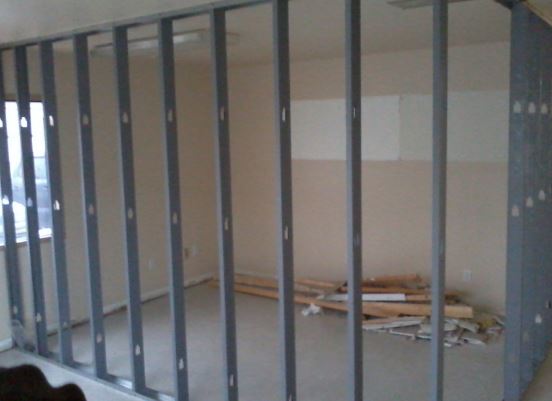
For almost as many years as people have been building homes for themselves, they have been doing it with wood. This applies not only to the covering, but the inside structure of a home or building as well. The truth is that today we have a better option: steel stud framing. Why use steel stud framing when wood has served so well over so many years? Good question.
At Mishawaka Drywall located in South Bend, IN, we love building. We believe that every day we contribute to the strengthening of America by providing quality made homes for people just like you. The trouble is that as passionately as we believe in building quality homes, we also respect our need to preserve natural resources as best as we can. The problem quickly becomes, how do you building more houses and buildings without affecting our natural resources? The answer is easy, with steel stud framing and the techniques that make it a better choice. 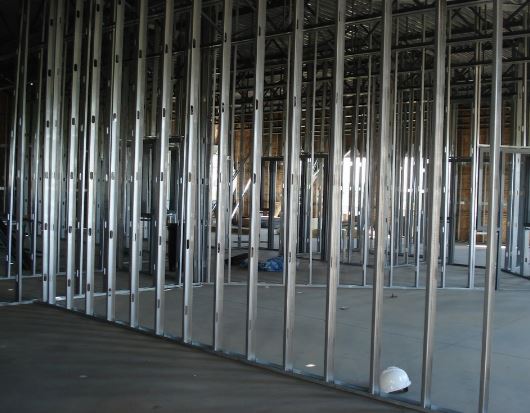
What are Steel Stud Frames?Carpet Removal First, we cut the carpet across the door frame with a carpet knife or utility knife and one straight cut through the carpet from one end to the other. Then we pull the carpet up to release it from the tack strips holding it down. We are now able to follow the wall pulling the carpet away from the carpet strips around the wall perimeter. Now We roll the unattached carpet into one big log. We can remove the carpet from the house and into the dumpster at this point. Now we remove padding and tack strips. We use our pry bar to remove the nails that attach the strips to the subfloor. The padding and strips join the carpet in the dumpster. Baseboard Removal We remove baseboard by scoring the caulk at the top of the board along the wall with the utility knife and then pull it from the wall with a putty knife levering it away from the wall as we work our way to each corner. We use the pry bar to remove nails as we go. We complete this task shortly. Clean and Level The next step is for us to clean the floor and then level it. These steps are to prevent laminate floor installation problems. Our putty knife is used to scrape any bumps, encumbrances, or globs of paint or glue from the subfloor. We drive extruding nails in with our hammer and nail driver so as not to leave metal bumps. After we’re sure the floor is clean, we check with a six-foot level to make sure there are no bows. If there are any places that are more than three-sixteenths of an inch out of level over ten feet, we need to use a leveling compound. Climatize the Flooring After we have finished preparing the floor and while our leveling compound is drying, we need to put all the laminated flooring into the room for three or four days so that it can adjust to the temperature and climate of the room. Climatizing allows the flooring to expand or shrink as it would after installation. Layout the floor before flooring it We are now ready to start laying the laminate, but first, we must diagram and do the math to make sure everything fits and lays in the proper direction. We will install the flooring planks parallel to the view of the room. For our project, we are using Pergo flooring installation as our floor installation guide. Laying the planks in the parallel direction makes the room look larger than it would if they were perpendicular. We prep the door frames by cutting with a vibrating saw the lower portion of the frame the exact depth of the flooring. We figure the number of rows by getting the width of the room and dividing it by the width of the laminated flooring pieces. The division will also tell us what width the pieces of the last row need to be. Since we bought laminate that has underlayment, all we need to do now is cut the pieces for the last row to our measurement and lay the floor. |
|